return |

|
Noteworthy Projects1633 Danish Bible |
return to |
Recently I did a rebinding project for an institutional client, The University of Missouri Special Collections, and thought I would share a little of the process (with the permission of the client). This is an informal description of the process, and uses common terms rather than more accurate technical terms. The book was a 1633 Danish bible which had remained in the possession of a single family since it was first printed. While it had not been treated roughly, it had still suffered from age as well as poor storage conditions at one point in its history. The original binding was partially intact, but the sewing structure was breaking down and the book was coming loose from its binding. After consulting with the client, it was decided that the best course was to resew the book and salvage as much of the original binding as was possible without doing a full restoration. Here is a brief series of images and descriptions from the project (click on each photo for a larger version): |
||
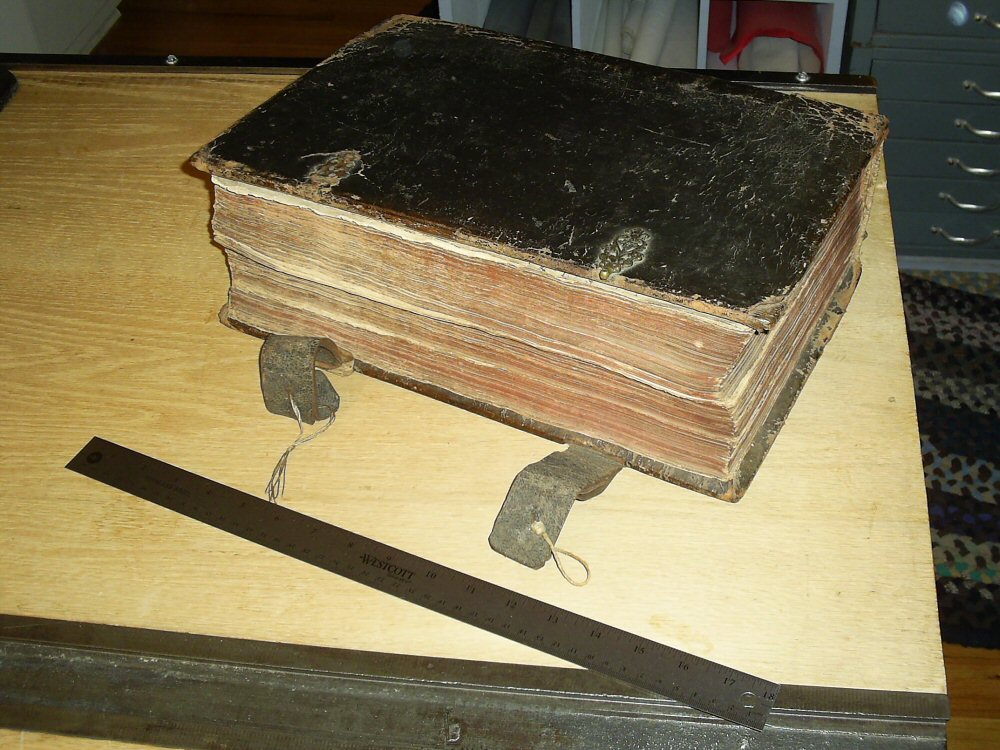 How the book appeared before treatment, with ruler for scale. Note the way the fore-edge pushes out in the center – evidence of the breakdown of the sewing structure. |
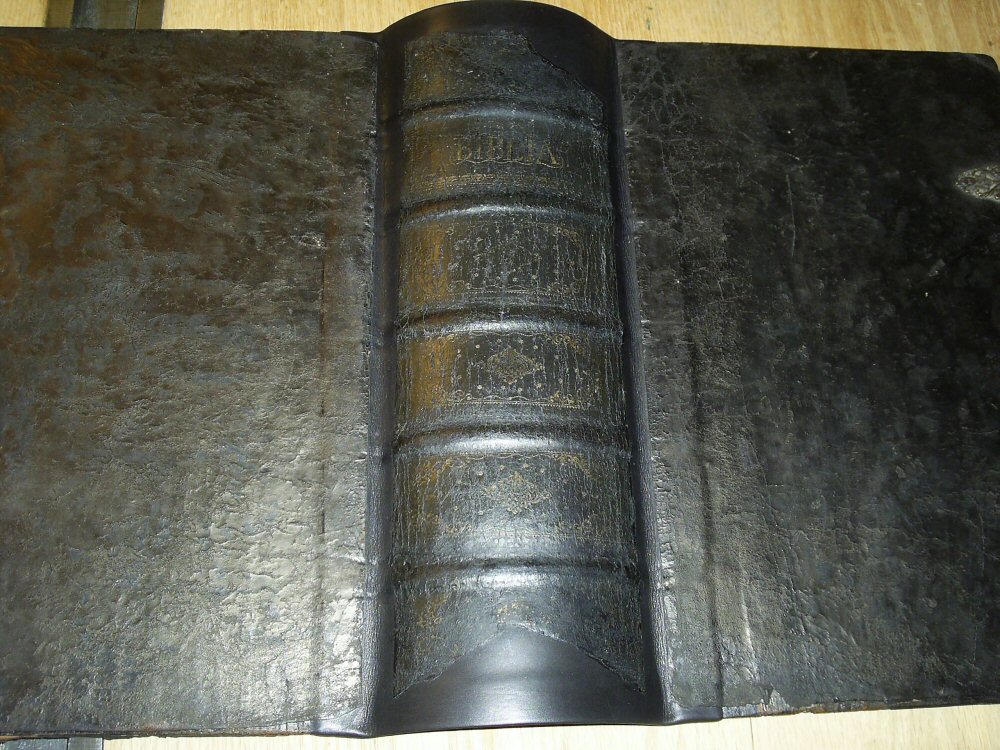
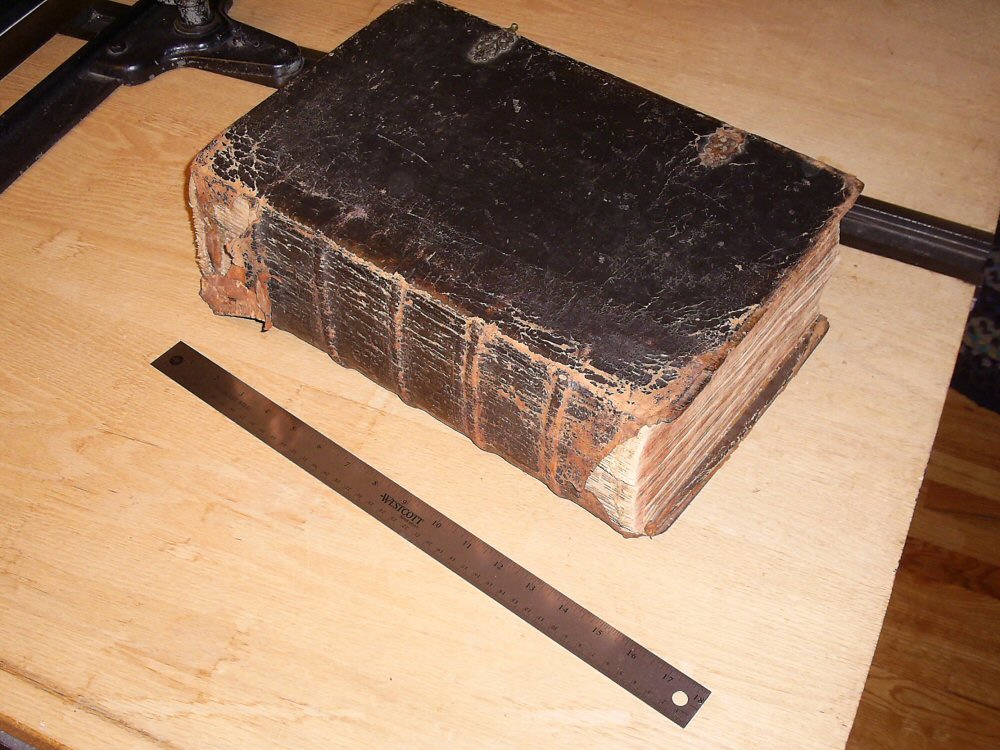 Condition of the book as seen from the rear. Note the missing section of leather on the spine, as well as the general wear of the original leather. |
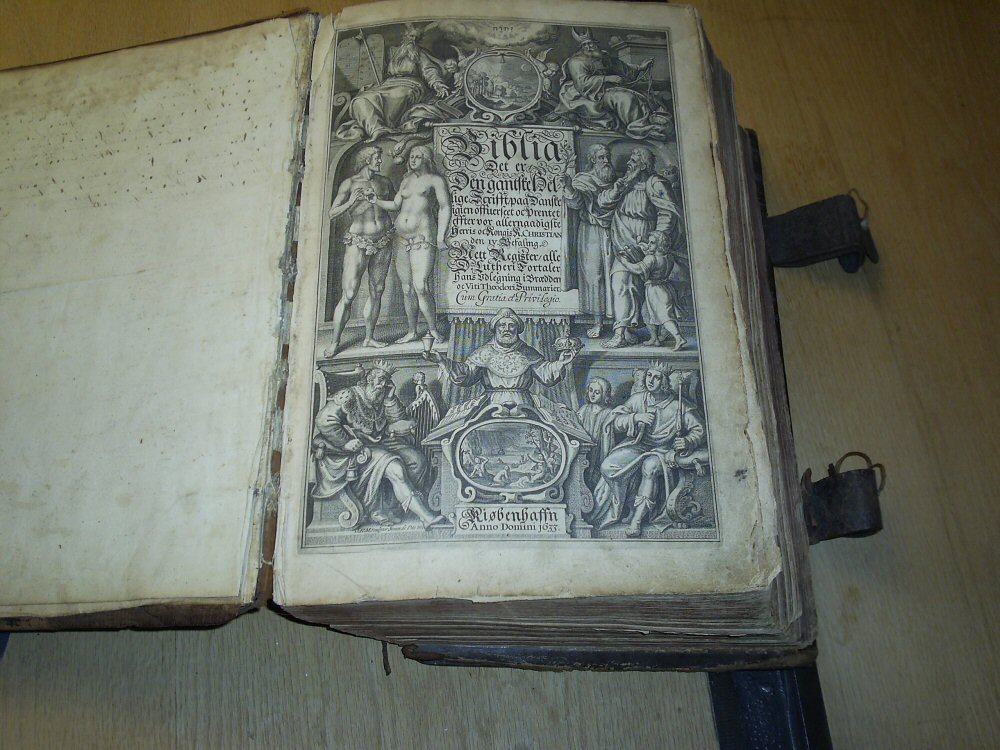 Frontspiece of the text. Also note the separation of the first signature, and the exposed sewing structure. |
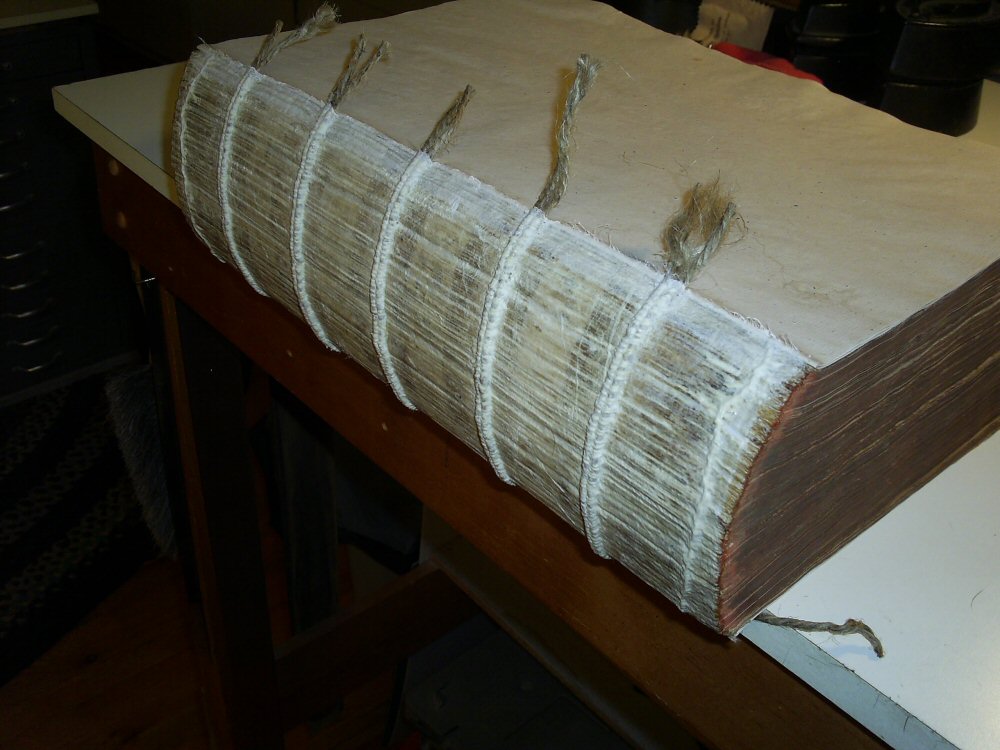
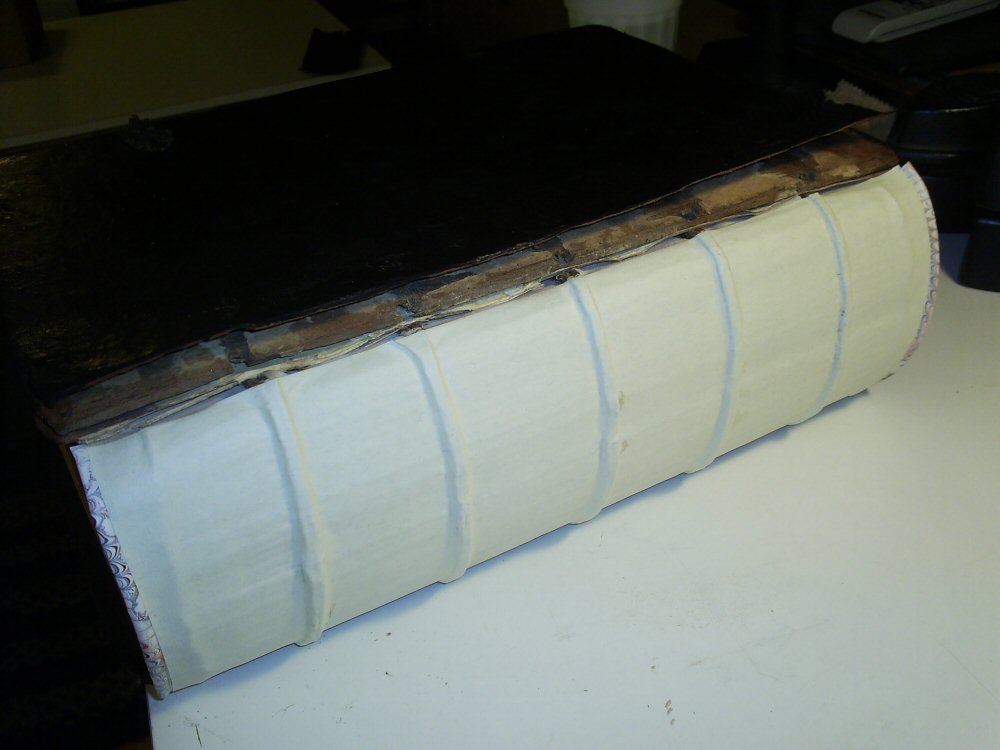
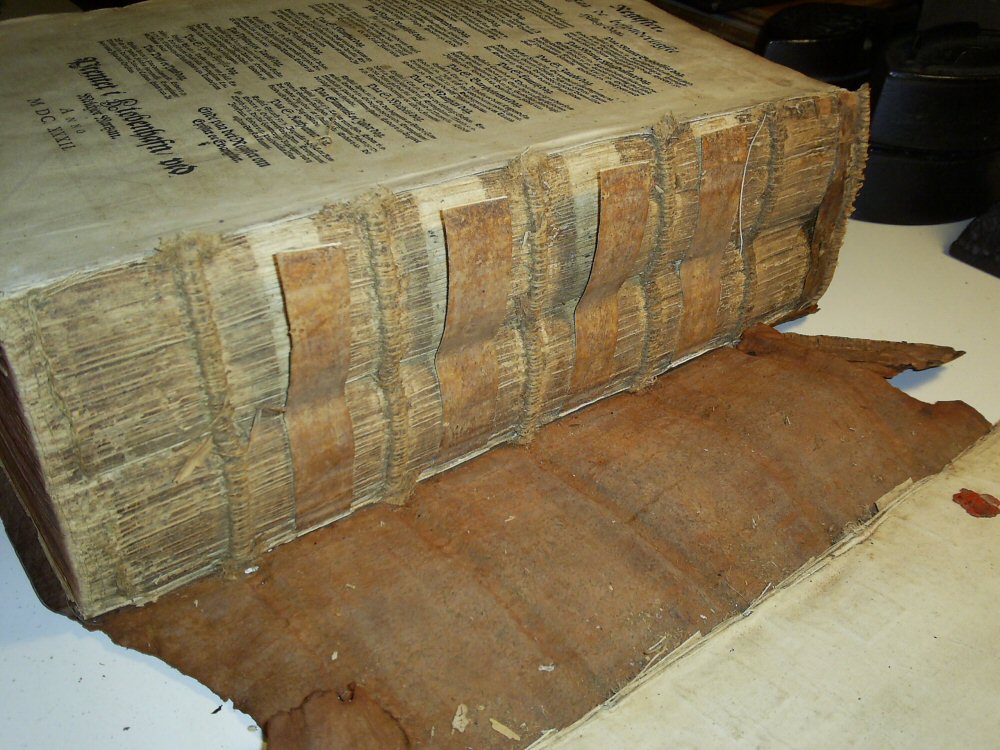 The spine exposed after I have cut loose the front cover. Three things to note in this image: |
|
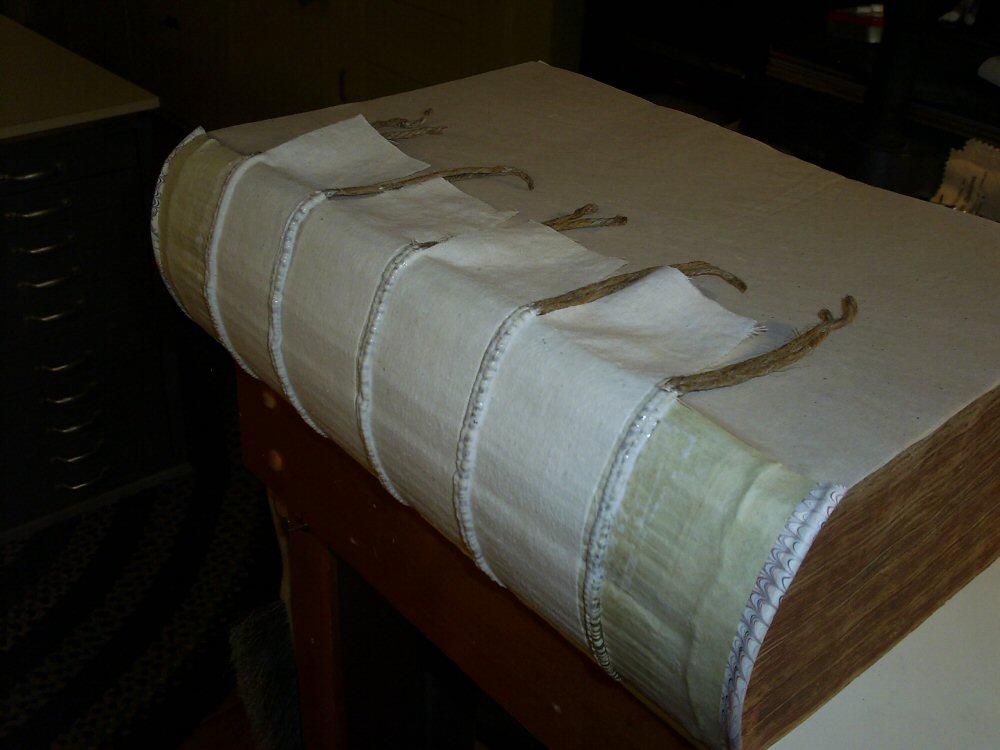
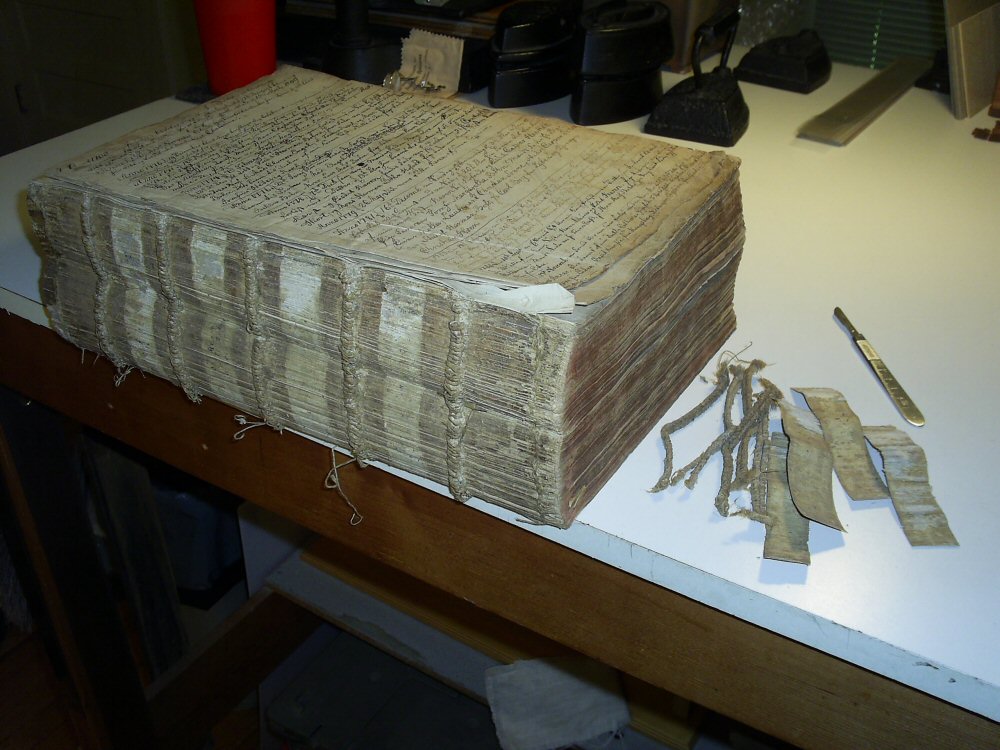 After I have removed the bands and cords. The sewing thread (now cut through) is still in position and exposed. |
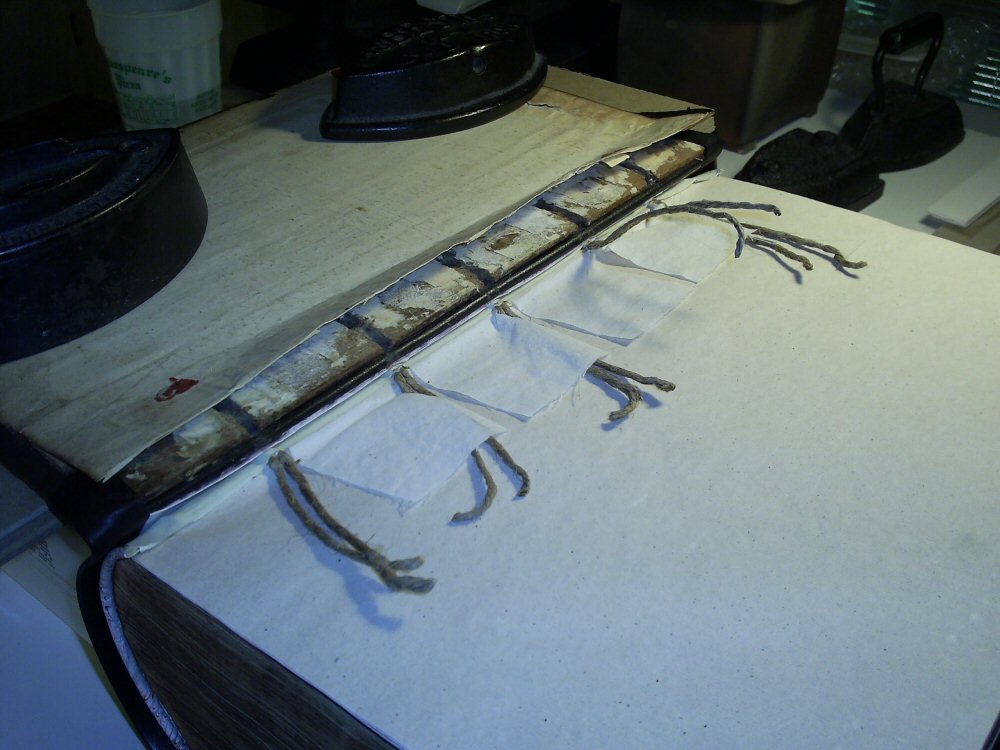
 Debris from removing the segments of sewing thread and other material from the center of each section of the book. This was just at the start – there was so much debris as I got further into the book that it was necessary to use a stiff brush on every folio in order to remove it, and contained all manner of nasty stuff. Yes, I wore a surgical mask at all times while cleaning this stuff out. |
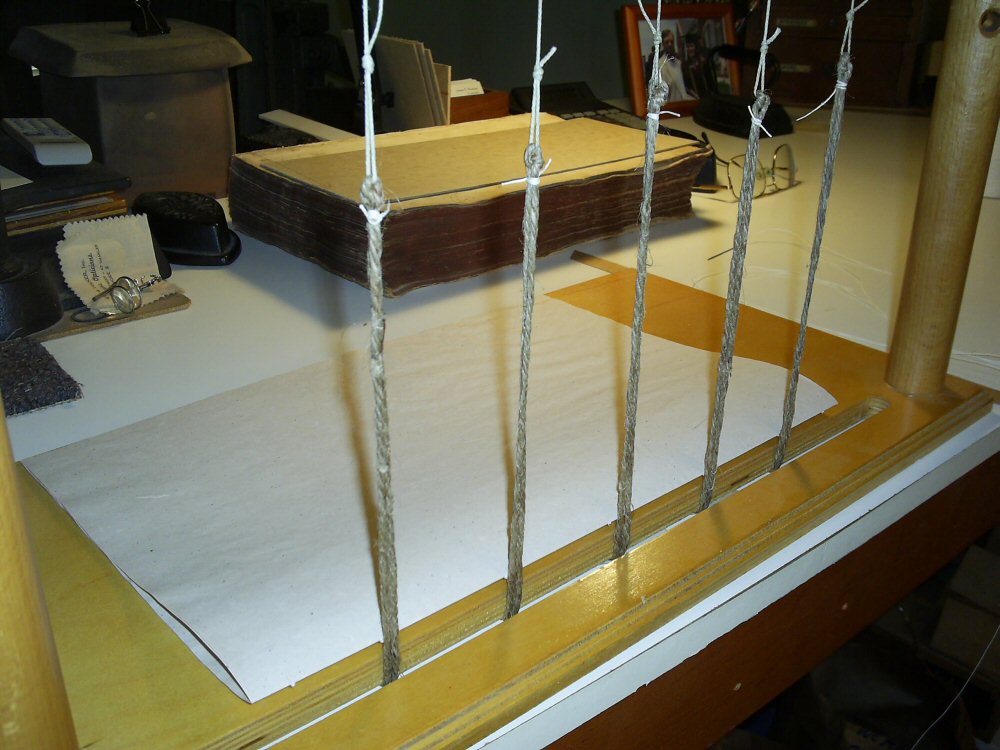 After the text block had been cleaned and minor page repairs done, the book waits to be resewn. I added a new section of handmade cotton paper to the front and back of the book. You can see the first one waiting on the sewing frame. While the book was very dirty, the sewing stations (where the thread entered and exited each folio) were still in good condition, so I was able to use those – the new cords are positioned for this. |
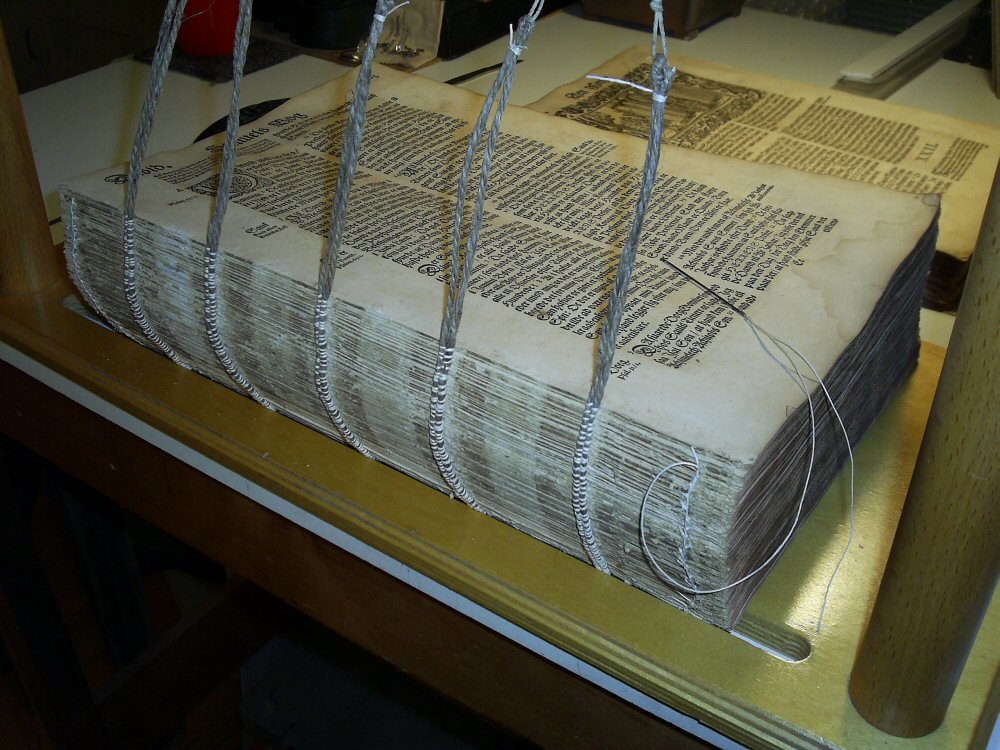 Sewing is about half done. 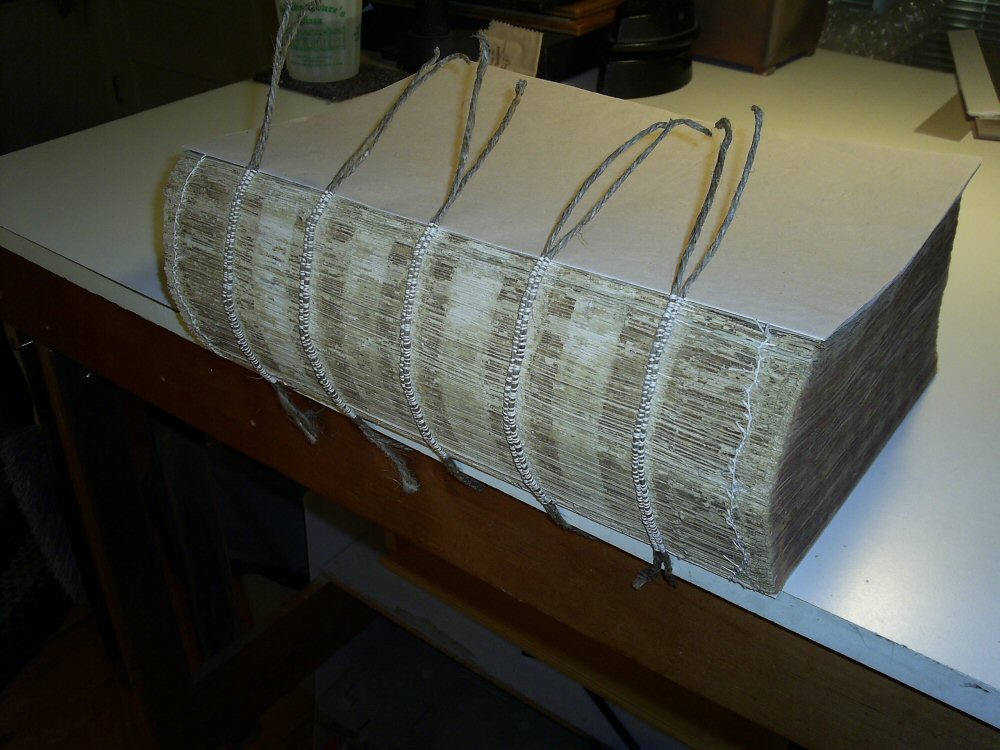 Sewing completed. |
First liner applied. This was a thin sheet of kozo (Japanese paper with very long fibers), which was 'stippled' into the spine slightly. This would provide support, but also function as a 'release' sheet if work needed to be done to the book again in the future. |
 Then applied a layer of handmade flax paper to the spine, followed by strips of heavy cloth between the cords. This would function much the same way that the vellum strips did originally, but would provide more support while being less stiff than the vellum. Also note the new head & tail bands, fashioned from handmade/handmarbled paper. |
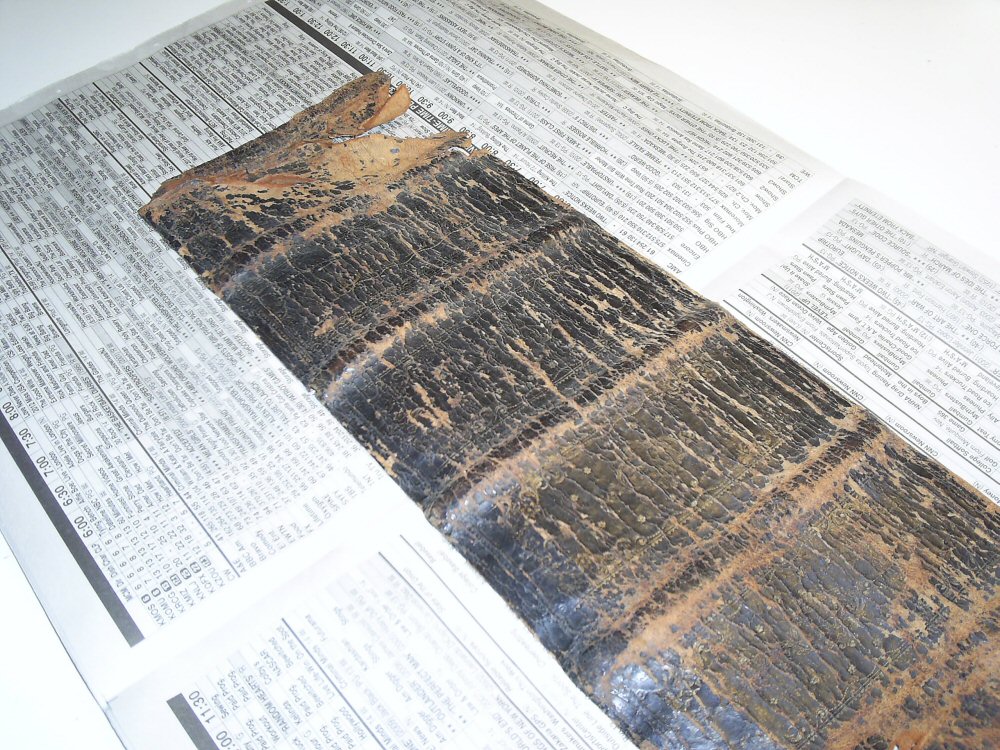 Spine leather removed from the cover, trimmed. Note how there is very little discernable tooling on the spine visible. |
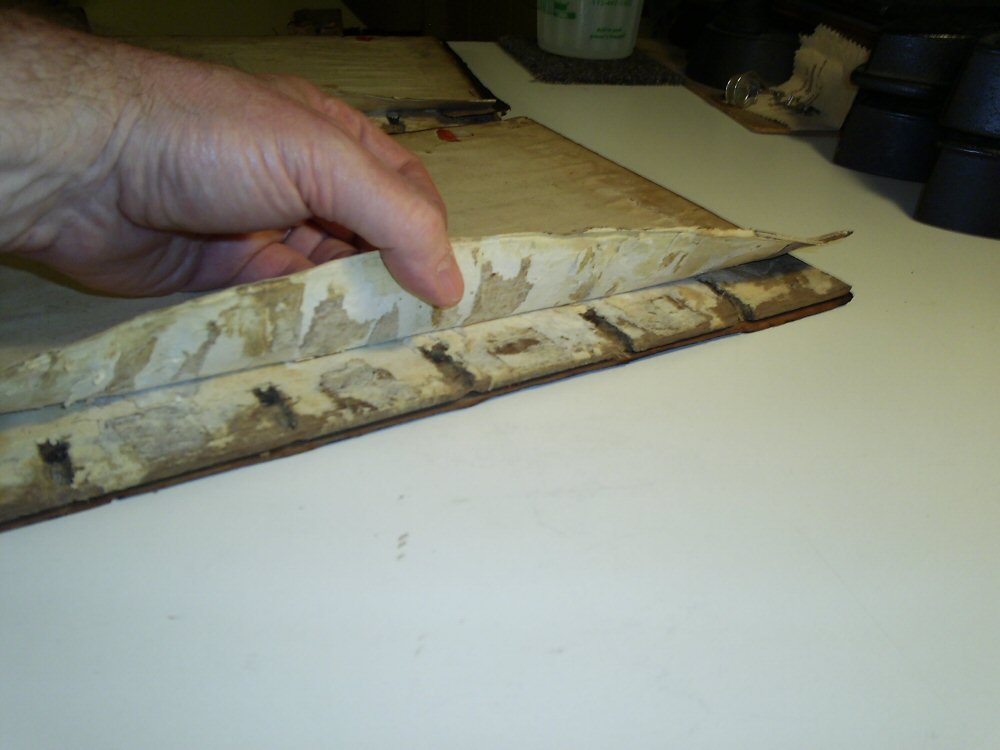
 Lifting the leather off the outside of the boards, preparing them for use. And in this case, note that the boards are actual wood as was typical at this time in history. |
 Lifting the endpapers off the inside of the boards, preparing them for use. We wanted to save the original endpapers, so this provided access for remounting the boards. Note the channels carved into the board to accommodate the sewing cords. |
 Checking the position of the cover and sewing cords. This is why I wanted to re-use the original sewing stations – so that the cords would line up again. |
 The repaired cover. A new leather spine has been mounted to the original boards, then the repaired original spine mounted to that. Note a couple of things here: the original spine has been re-dyed, so that the tooling is much more evident than it was previously. And the leather has been molded to the spine of the text block, allowing for the raised bands to once again be positioned correctly. |
 Preparing to mount the text block into the cover. The cords will again lace into the original channels, then the cloth strips mounted between them. Once that is done, a blind stub of handmade paper from the outside section will be adhered over them. Finally, the original endpaper will be pasted back down. |
 The final result on the inside. 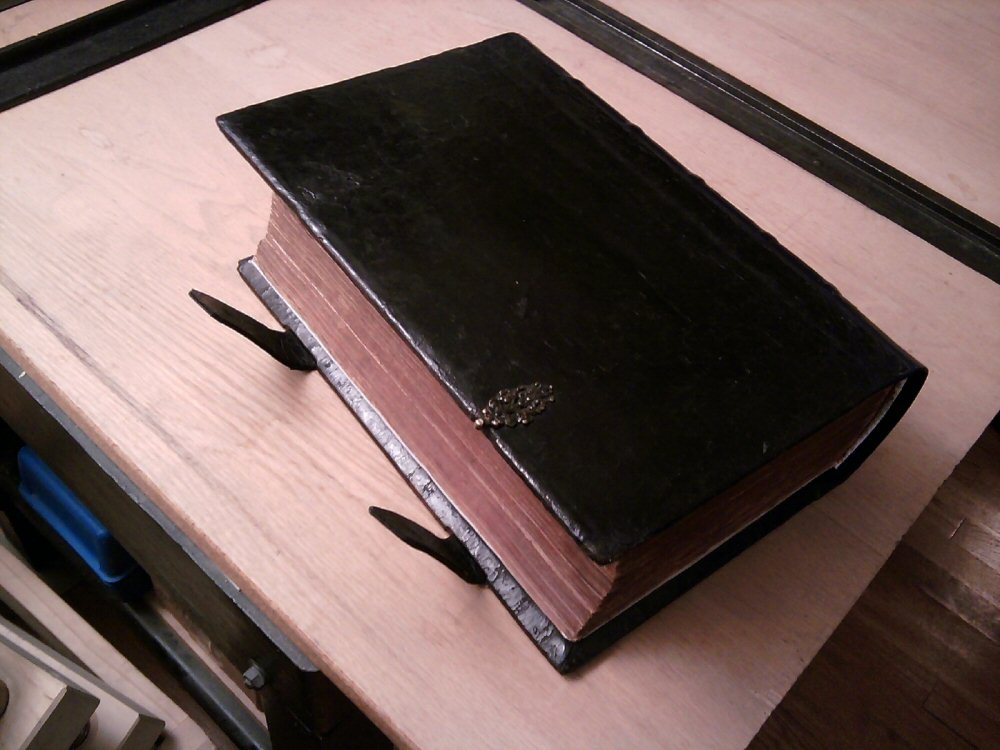 The final result on the outside. |
|
|
BY APPOINTMENT ONLY |
 site designed and maintained by |